Showing posts with label DIY wedding. Show all posts

Saturday, February 12, 2011

The 52 Colors of Weddings Project : Apple Green

Have you heard of the 365 project?  It seems to be the buzz around the web lately. Many photographers have started a motivational project for themselves to take a photo each day of the year. This is a great way to document your year. And although I am a photographer & love what I do,  I tend to take a lot of photographs in one day but not every day.  But I have been inspired by a fellow blogger, Brandi Girl to create a less ambitious version of this and apply it to the Artful Bride Blog. Let's call it the 52 Colors of Weddings.  Every week I will choose a new color to share with you. 


 52 Colors of Weddings : Week 1 - Apple Green!!


So I am going to start the week off by sharing some great Apple Green etsy.com finds:
Dyed Green Peacock Feather Clip ($25) by LovMely / Fabric Flower & Wheat Boutonniere ($12) by Pixel and Hank / Flora Verde silk-lined clutch bag ($85) by Red Ruby Rose / Spring in Bloom Poms ($9 set) by My Silly Bear / Tulle Pom Party Picks ($10/10) by Shortcake Party Picks / Satin Flowers ($6.50/12) by Milky Supplies.

Green & Polka Dot Flask ($18.50) by Kryan2Designs / Modern Initials Wedding Invitation ($4.50) by Paper and Pinafore / Apple Tart Green Orchid Hair Clip ($7) by Ms Formaldehyde / Hand Dyed Shawl Scarf ($15) at Nits Creations / Apple Ribbon & pearl Necklace ($25) by Carlena Designs / Custom Groomsman Ties ($108/4) by Toy Breaker / Begonia Candle Holder ($16) by LaBella Candela /
Reception Table Cards ($3.25) by A La Mode Bride.

Thursday, September 23, 2010

DIY Banners via My DIY Wedding Day

 I found this easy DIY project today on My DIY Wedding Day:

"  Tie a 12-inch piece of ribbon to the top of each letter so that it hangs secure and straight. Attach each of those ribbons to a super long rope between two trees or posts outdoors. Twist a string of large Christmas lights to the rope so that sparkles of light are in between some of your hanging letters.

   This serves as a great backdrop to both celebrate your day and to eliminate confusion when everyone's looking through their summer wedding photos -- they'll know exactly which ones were from your gorgeous outdoor reception! (Another way to use these without making them the focus of your decor: hang them at the entrance, where your welcome sign would be!"

  Sounds easy enough right?


   But with all the things you need to get done for your wedding day, you may feel overwhelmed and that you are running out of time to get it all done.  But you want your wedding day to feel more personal and filled with handmade items. Hmm ... Don't be afraid to depend on other artisans out there to get the job done.  Here are some etsy artists that may be the key to helping you get it all done right


Personalized Banner $15 at Earmark / Pom Poms set of 15 ($52.50) at My Silly Bear / Burlap Banner $10 at Funky Shique / Just Engaged Banner $25 at H Lea 100 / Chair Banners ($20) at Funky Shique / Be Mine ($17) at Bekah Jennings.

Tuesday, September 7, 2010

DIY Aisle Flowers

   Nothing but a simple DIY flower aisle vase to get the ideas flowing about how to save on your wedding day decorations.  This fabric cover flower vase by Ashley Meaders  is so simple to put together.
Supplies Needed:
Bygel IKEA container
Spray Mount
Fabric 
Twine and/or ribbon
Scissors
Flowers 


   1. Cut fabric 14"x19"
   2. Spray outside the container & rim
   3. Tightly wrap fabric against the container and smooth out air bubbles. Tuck the fabric 
       around the top of the container. Cut any excess fabric in the back making a smooth line.
   4. Add twine/ribbon around the back of the container.
   5. Add your flower arrangement.


For detailed instructions, visit the  original post from OnceWed.com 

Friday, September 3, 2010

DIY Bridal Bouquet

  One great way to save some money with your wedding day plans, is to make your own bouquets. Buying wholesale flowers, and of course flowers in season help. And if you have never made a floral arrangement in your life - I found a great blog post on etsy.com. Brookelynn Morris staff writer for Craftzine offers tips to help design your own arrangement with ease.

Materials Needed:
Flowers
Large clippers
Floral Scissors
28 gauge floral wire
Wire cutters
Floral tape
Rubber bands
3-4 yards of lace and ribbon
Decorative straight pins

   For those new to the art of floral arrangements, I recommend practicing these steps & playing around with your color palette ahead of time. You can usually find little deals at your local farmers market on in-season flowers. And just think, practicing only equals lovely little arrangements around your home.
   For the detailed step-by step process, please visit etsy's original post. 

  For more money saving wedding tips:
Cost of A Wedding

Wednesday, September 1, 2010

Three Great Pom-Pom DIY Ideas

   Lately it seems that DIY pom pom decorations are popping up all over the web. I remember making tissue paper flowers and pom poms when I was about 6 years old.  I never would have thought they would make such a great and less expensive way to decorate an event. But they add a very cheerful and festive vibe to the room. And the best thing is, they can be made into whatever color suites your theme.   That being said I thought I should share with you a couple of my favorite links to Do-It-Yourself Pompom projects.

   First up might be my favorite: Fabric Pom-Poms via the Once Wed Blog. This may run you a little more expensive then the tissue paper poms. To cut cost, think resusable items. If you have left over fabric you can use from previous projects - go for it. You can also shop the sale section at your local fabric store for deals.


This project is simple enough that anyone who knows how to use a glue gun can do it. To view the full instruction sheet, click here!

  Second is of course, the queenof do-it-yourself, Martha Stewart's Dahlia Pom-Poms.  This project is very easy that I think even the 6 year-old-me could handle this.

   Cutting the tips of the paper, gives it the feeling of dahlia petals.  So if this is your style or you are just looking to try an easy rainy afternoon project - click here for detailed directions!

   And lastly, the impending fall-winter wardrobe change over that will occur too soon - has inspired me to post this pom-pom creation via Ruffled Blog- the Pom Pom Bouquet!  This is a great alternative to using real flowers. And it may be just the thing to add to your fall or winter wedding.
  But as you can see, this project is not for the lazy Do-it-yourselfer. There are some supplies you will need to purchase in order to pull this off.   But the results would be so unique.  For instructions on this project, visit Ruffled's original posting.
  I'm even thinking that you could add a few vintage broach pieces to this bouquet for a little bling.

Etsy Shop, Lorelie Kay Design Vintage Broach mixed media, ($12)  

Thursday, August 26, 2010

Love Letters via Eat Drink Chic

I was exploring the wedding/art blog world and found these sweet little DIY Love Notes from Once Wed Blog via Eat Drink Chic Blog ... 

"This DIY includes styling and presentation ideas for ‘Message in a Bottle’ guest favors with a twist. Enclosed is a little scroll that not only contains a message to your guests but also some extra blank notepaper so that they can write a little message back to the bride and groom and drop it in a jar labeled “Love Letters” incorporated in the centerpiece design of each table..."
- Amy of Eat Drink Chic


I thought I would share this DIY project with my crafty wedding enthusiasts out there. For instructions: Click here! (This will redirect you to the original post on Once Wed)


For More Do-It-Yourself wedding & party projects: 

Monday, August 23, 2010

Paper Umbrellas via Paper Mash

Good afternoon everyone! I am taking a few minutes to send you another little DIY project brought to you via A Field Journal by Paper Mash.  This is just a very personal touch to your event that you can make yourself. I thought these were cute and very classy so I thought I would pass the link along to you!


Click for a downloadable step-by-step direction sheet.

DIY Wedding Shoes

   While doing my usual hop from one inspirational wedding site to the next, I came across a fantasticly (if that's a word) easy DIY post from Green Wedding Shoes. All it takes is a fabric of your choice, fishing line & of course the shoes!  Check it out.


For more DIY ideas, check out a some previous posts by Artful Bride :

DIY Center Piece Website
Big Bloom Small Budget on Martha Stewart

Monday, May 10, 2010

DIY Ideas Center Piece Website

I was recently given a hot tip on a new site with some really nice Do-It-Yourself centerpiece ideas. The site is Object Spendor.  And not only do they supply the list of everything you need, you can purchase the list right there on the site. This makes it so easy to determine how much you will spend & help you stick to your budget.


And they offer helpful tips on how to reuse these same items for another project. Which is a way cool, earth-friendly approach that many brides are looking for today.

Publish Post


Thanks! Lisa from Delicious Desserts for passing this along!


And for our other DIY projects idea posts visit:


Friday, May 7, 2010

DIY on Design Sponge

A cute little DIY project courtesy of Design Sponge! This is a great website with a whole bunch of interesting design ideas for you personal space.  I thought this do-it-yourself project would be a cute option for center pieces at a reception. You can customize each center piece by adding photos or other memorabilia.

Saturday, May 1, 2010

Fancy Paper Lanterns on Crafty Nest

Plain paper lanterns made fancy by Craft Nest.  This is an easy do-it-yourself project to add a little pizzaz to your paper lantern decorations. Check out Crafty Nest for the instructions.


Click here for another easy DIY project for making potted seating place cards.

Thursday, April 22, 2010

Backyard Wedding Tips


   A backyard wedding you say? Whether you are trying to save on your budget, looking for an earth-friendly place to have your wedding or just have a really great backyard (or a friend's that you can use), having a backyard wedding can be a more intimate place to hold your ceremony. So here are a few tips to help you out in your decision.


Consider the Space
   Your backyard may be a fantastic backdrop, out there are limitations to the number of guests you can have. May sure this plan is realistic for the space you have. There will need to be plenty of room for chairs and tables. And a spot for dancing, if you choose. Also consider how many bathrooms are available to accommodate everyone.


Equipment 
   Stuff. Yes you will need to consider all the stuff that you will need for your wedding. I'm not talking about the dress and cake. You will need to budget for rental of chairs and tables, linens and buffet tables and a sound system.  Factor in these costs before you start to plan. You will also need to consider electricity and accessibility to it. You may also need a generator. So after all these items are factored in - it may be cheaper to book someplace else that can provide all this.


Food and Drinks
   Handling food and drinks can often be a cost-saving. But many couples will find a day that goes much smoother if they hire a caterer to handle all the food preparation, service and clean up. 


Weather
   Your backyard may be filled with awesome flowers in the spring, but does it rain often that time of year? Weather is always a factor to consider when planning an outdoor event. Make sure you have a backup plan just in case Mother Nature has a different idea. (I have been to a few weddings when there was no Plan B. And finding a tent big enough in the 11th hour for 100 guests was impossible. - I was left standing in the rain with a kind guest holding an umbrella so I could get some good images.)  And I know it sounds funny - but be careful of the sun. You want to be sure that the sun isn't going to blind your wedding guests or you while you are saying your 'I do's'.  Offering your guests sunscreen and paper umbrellas are a great way to help protect your guests and add a little style at the same time.


Pets and Pests
  If you are planning a wedding at your home, it's important to consider your furry friends and what all this commotion will do to them. If they are people lovers and good with guests and the social scene, then having them at your party is up to you. If, however, they are not, it may be a good idea to make arrangements for a quieter place for them to hang for the day. Also if your four-legged friends are staying - don't forget to have someone feed & walk them at their usual time. This will help keep them on some type of schedule and lessen the chance for unwanted accidents or misbehavior. (You may also want to consider your neighbors pets. The last thing you want is your neighbors dog howling during your wedding vows. See 'Permission below'.)
  Be aware. Often outdoors equals bugs. Make sure you have considered this in your plans. You may want to have citronella candles and bug spray on hand if necessary.


Permission
   You should also check with your local government or complex association to make sure there won't be any issues with noise ordinances and parking. The last thing you want is the neighbors calling the cops on your party. Speaking of which,  it would be a great idea to let your neighbors know what you are planning.  You can even invite them over for a drink at the reception as a nice gesture.


Clean Up
  Yes, having a party at your house means that you or someone you designate will have to clean up the mess.  Often if you have rented your equipment, the service company will provide delivery/pick up (make sure you know that up front.) And caterers should also be in charge of cleaning up after their service. But don't forget all the little things that will need to be done once those big items are gone. Someone will need to be in charge of all the miscellaneous cleaning before (including lawn maintenance) and after the wedding. So unless you want to do it yourself or have a trusted friend, you may want to consider adding a cleaning service to your budget.


I love outdoor weddings!  Happy planning! Need some inspirations?Here are a few other articles to help:
Wedding Budget Worksheet
Garden Themed Wedding on Etsy.com
Inspiration: Garden Theme Cake
Real Wedding: Beth & Joe's DIY Wedding


Wednesday, April 21, 2010

DIY on Martha Stewart

Found: Lovely little Do-It-Yourself center piece Big Bloom idea for small budgets on Martha Stewart.

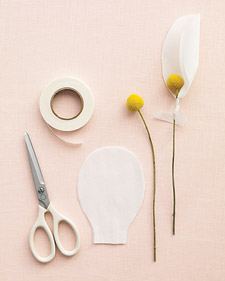
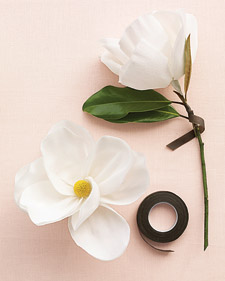
DIY: Magnolia Blossom at Martha Stewart


Like this idea? Check out another easy DIY by Rachael Ray or table seating by yours truly. 

Wednesday, April 7, 2010

DIY Wedding Center Pieces via Rachael Ray

I was wandering around the internet today looking for some new DIY inspirations. And I found some great little ideas on the Rachael Ray website for simple little center pieces. Click the link below the mage for more instructions.


Friday, March 26, 2010

Bridal Shoes on Etsy

Etsy Find of the Week: Bridal Shoes & Shoes Accessories

Have a plain pair of shoes you love but are not fancy enough for your gown.  Try a clip to add a little pizzazz!


Rhinestone & Ostrich Custom Adornment ($42) at  Feathers & Frills /  Peacock Feather ($17) at StarzSelection

 Custom feather Clips ($55) at LoBoheme / Vintage inspired Ivory with Swarovski pearls ($42) at JurqitaHandmade / Peacock Handpainted Pumps ($80) at NoraKaren / Full of Grace ivory clip ($25) at theBrideGene  / Raspberry Bloom Shoe Clips ($9) at FrancineToukouBloom / Paris Wedding Shoe Clips ($30) at CMitrou / Bridal Ballet Flats ($68) at HydraHeart


Thursday, March 25, 2010

When Do I Book My Vendors? Pt4


Fourth Wedding Planning Timeline

How exciting! You are almost there! And it may feel overwhelming right now. But hopefully you have been following the planning tips and previous wedding planning schedule - and are right on time.

Month Before
* Get your marriage license. This process differs depending on your county and state. 
* Have your 3rd dress fitting.  You may also want to schedule this the week before for peace of mind unless your dress fits perfectly at this 3rd fitting
* Enter your RSVP's into you guest list database. Don;t be afraid to call those who you have not heard from.
* Mail out the rehearsal dinner invites.
* Order the alcohol. Since your headcount is complete, you can have an accurate order.
* Mail out your final payments to vendors. You don't want to be worrying about making payments the week or day of. 
* Confirm your hair and makeup appointments.
* Get your hair cut and colored if necessary.
* Send out the directions to all those who are drivers of the wedding party and family. Rented cars, chauffeurs will have time to organize their route.
* Organize a seating chart. Make this chart first on a board & guest names on sticky notes. This way you can move them around until you have a completed arrangement.
* Write your vows! If you are choosing to write your own vows - now is a great time to do it. Don't wait until the night before! 

Week of
* Send the final guest count to your caterer and the venue coordinator & your personal coordinator. Most venue need to know this 72 hours before your wedding.
* Delegate smaller wedding tasks to your wedding party and friends. IE who will carry the flowers from the church to the reception, who will bustle the dress, who is in charge of gifts, and someone to hand out tips to your vendors. (If you hired a coordinator, they also may be able to handle some of the smaller details depending on what you agreed on.)
* Confirm the arrival time with all your vendors if they haven't called you to check in.
* Make arrangements to pick up or have delivered your dress.
* Wear your wedding day shoes around to help break them in. Try to dance in them! 
* Check in with your photographer on the list of important photographs and family members
* Organize tips for your vendors to be given out day-of
* Book a massage or spa treatment, manicure etc to help you relax
* Assemble your welcome baskets for out-of-town guests
* Confirm your honeymoon arrangements & pack for your trip.

For other monthly planning tasks to help keep you on schedule:


Wednesday, March 24, 2010

When Do I Book My Vendors? Pt3


A continuation on this weeks tip: Wedding Planning Timeline

Three Months 
* Finalize the flowers and the menu. (Season choices will help keep down the cost)
* Finalize your schedule. Make sure you know the timeline of your ceremony and reception.
* Now is a good time to send this timeline to your vendors. Giving them a preview of the schedule will allow them to suggest changes for a better flow.
* Make your list of all the people giving readings at the ceremony and speeches at the reception. 
* Print your programs and menus. (You can choose to make something simple on your home computer if this is not within your stationary budget.)
* Order or make your favors. This is where you can be creative. (See our latest DIY favors/placement cards art project)
* Have your second dress fitting. Purchase your undergarments. (Save the cut-off fabric from your dress! This can be used creatively as a wrap for your flowers or another decorative detail. IE a small bag.)
* Buy your rings! Doing this now will allow time for resizing.

Two Months
* Meet with your DJ/band. This is the time to review the playlist. Now remember, you cannot dictate every song that is played. But you can suggest nicely that the band or DJ pick up a few songs not in their normal playlist.
* Meet with your photographer. If you like, schedule a walk-thru and suggest locations for photographs.
* Touch base with all your vendors about the schedule. You can do this via a quick phone call, or schedule a lunch for them to all meet up at. 
* Submit your wedding announcement to the newspaper. (Check with the publication about the photograph used as some have strict rules about this)
* Send your invitations! Mailing your invitations now allows for guest to make travel arrangements if necessary.  Set your RSVP for roughly 3 weeks after the postmarked date.
* Enjoy your bachelorette party! Feel free to suggest this idea to your friends if they haven't mentioned it. They will want to celebrate your upcoming-big day too!

For other monthly planning tasks to help keep you on schedule:


Tuesday, March 23, 2010

Wedding Inspiration of the Day: DIY Seating Place Cards

Spring is bloom! And the celebrate, here is a little bit of inspiration from Mother Nature!


This is a very easy DIY project! If you are not the crafty type - no worries! This is so easy!  You will only need to following supplies:
Hot Glue Gun (with glue sticks)
A pair of Paper Edging Scissors (approx. $2 ea)
12x12"  Scrapbooking paper ($.89 to $2 per sheet)
A few sheets of heavy weight printer paper 8.5x11"(I suggest buying an off-white or textured paper)
Fresh, dried or fake flowers (depending how far in advance you want to make these)
Roll on Tape  (roughly $3)
Box of Toothpicks (at any grocery store $.89)
Spanish Moss ($1.25 - $4 depending on quantity needed)
Small 2" flower pots (found on Ebay for $.99/ bulk also available)
A printer available for printing heavier weight papers

(Note most of these supplies can be purchased at www.createforless.com)


First Step: I designed a quick spread sheet using Microsoft Excel. Each column I made 2"Wx1.25"H.  I choose a font that I liked (or in your case matches you wedding theme/stationary.)  You can take the guest list information directly from your RSVP list so you know how many you will be making.  (Don't forget to select the option for 'Border-Type'  in your formatting palette so you have a cut-guide). Print on the heavy-weight  printer paper.  Ok so the hardest part is done!

Second Step: Use the edging scissors (available in all sorts of patterns), cut on the inside of your guide line. Then measure and cut the patterned paper (3"Wx 2.25"H). Use the roll-on tape to adhere the two pieces of paper together.

Third Step: Having your hot glue gun ready, use a small dab to glue the toothpick to the back of your paper. Rotate the toothpick in a circle so that the glue blob is all around the toothpick.

Fourth Step: Loosely stuff some of your spanish moss into your pot. If you are concerned about the moss staying in the pot, you can always place a little dab of hot glue into the sides of the pot near the bottom.

Fifth Step: Place your now dry card-on-toothpick into your pot.  And Whaalaah! you are done!


You can also choose to use live plants, succulents or fresh herbs instead of fake potted plants. And then your placement card becomes a favor to your guests as well!


If you have any questions about this DIY project or have ideas of your own you would like to share, please email me at ArtfulBride@gmail.com .


Monday, March 22, 2010

When Do I Book My Vendors? Pt2


Seven to Six Months
* Begin to organize your wedding day timeline. For example, what time will the cake cutting be? (Don't forget to include when you expect your vendors to be on site.)
* This is the time you will want to select your invitation design & get your order out to the calligrapher.
* Mail out your Save-the-Dates.
* Meet with your officiant to map out the ceremony and organize all the official documents you will need. (This varies on the county and religion. A counseling session may also be required.)
* Book your florist.
* Time to get the girls together to shop for your bridesmaids gowns.
* Book your transportation for your day of. (limo or buses, classic cars, shuttles etc.)
* Book any additional necessities for your location. IE lighting components, portable toilets etc.
* Start Planning your honeymoon! You will find better deals available by booking airfare and hotels in advance.

Five to Four Months
* Check in on your wedding invitations. Request your samples & make any revisions necessary.
* Shop for your shoes and have your first dress fitt
ing. Don't forget to bring the shoes so the length of your gown can be determined.
* Time to order the cake! Test 3 different bakers. Be aware that some bakers require more of a lead time then others.
* Compile your song list to coordinate with the events of the day.
* Book your rehearsal and the rehearsal dinner plans.
* Find your hairdresser and makeup artist. Make a few appointments to try out a few on days when you have plans out. This will be a good test to see if the style lasts. And be sure to take a snapshot of the do & makeup for the wedding day.
* Plan out the goodies you will be including in your welcome baskets for out-of-town guests.
* Forward your guest list to your bridal shower planner.